
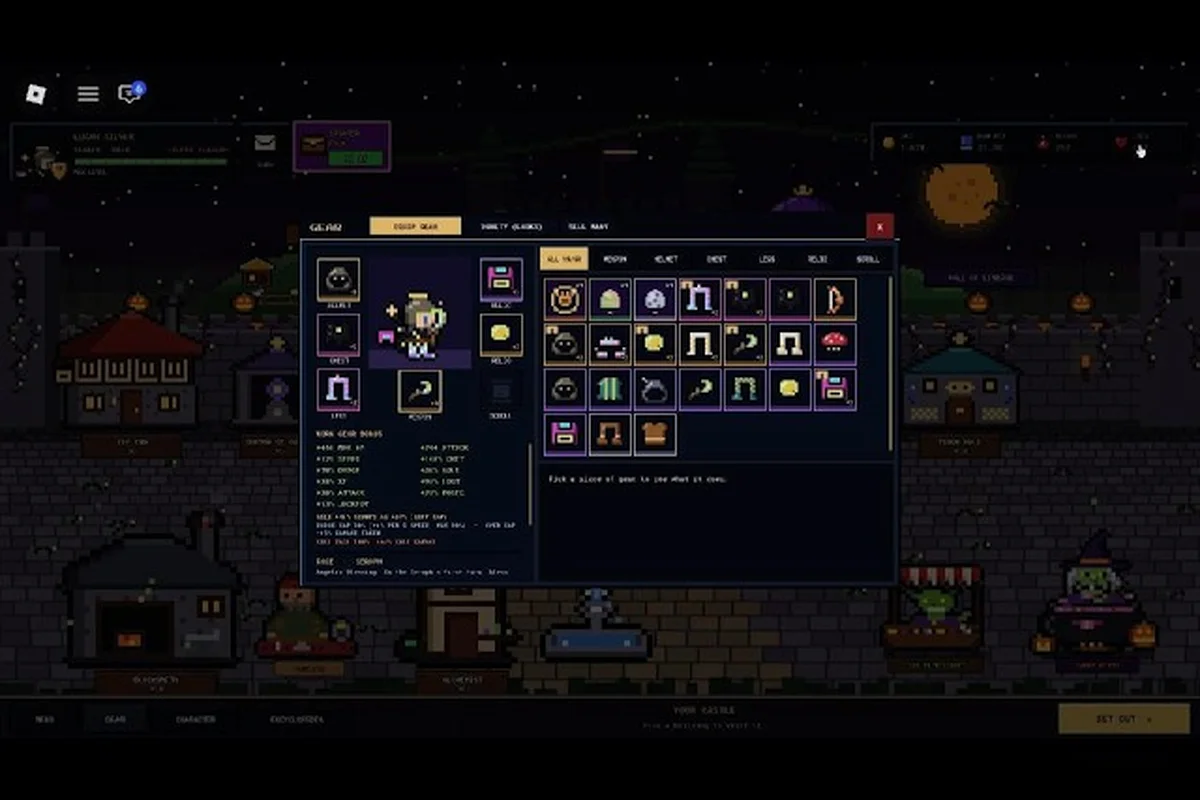
Boss fights in Pixel Lineage punish sloppy preparation. Each hero only has 3 Lives, turn-based battles give you six actions per turn, and a single missed Guard can snowball a winnable fight into a wipe. This guide on Pixel Lineage how to beat bosses breaks the encounter loop into a readable plan: study the boss pattern, stack defensive actions on the danger turn, and bring potions to recover mid-fight. You will learn the full unlock path for harder difficulties, the dungeon team comps that survive them, and where the best drops come from once you clear a run.
Understanding Boss Mechanics in Pixel Lineage
Every dungeon in Pixel Lineage ends in a boss room, and each boss runs on a telegraphed action queue. The fight itself is turn-based, so the boss announces two or three moves ahead through the UI before executing them. Reading that queue is the single most important skill for any team trying to clear Torment Mode.
Timing Prompts and Turn Order
According to the official Pixel Lineage system reference, battles start with 1 Energy and gain +1 Energy per round up to a default cap of 10. You get six actions per turn across a four-hero party: Attack, Skill, Guard, Meditate, Potion, and Run. Energy feeds your Skills, while Guard and Meditate recover Energy and reduce incoming damage on the boss's heavy turns.
| Action | Energy Cost | Primary Use |
|---|---|---|
| Attack | 0 | Steady chip damage on safe turns |
| Skill | 1–4 | Class-defining burst or utility |
| Guard | 0 | Halves the next incoming hit |
| Meditate | 0 | Restores +2 Energy next round |
| Potion | 0 | Heals 30% max HP to one ally |
| Run | 0 | Forfeit a non-boss fight |
Reading the Telegraphed Action Queue
Bosses telegraph two actions ahead on the standard and Hard difficulty. In Torment Mode the queue length grows to three, so the marginal value of Guard climbs sharply. A clean team comp will Guard on telegraphed heavy turns, Meditate on recovery turns, and pour Skills into the boss only on the safe windows between big hits.
A practical reading rule that the community calls the Two-Turn Read: when the queue shows a heavy hit next turn, Guard that hero. When the queue shows a heavy hit in two turns, Meditate so you have the Energy for a counter-Skill the following round. Run that loop for every boss and most Torment Mode fights become survivable, even with a budget team.
Why Healing Windows Matter
Potions restore 30% of max HP, but you can only carry three per hero. Burning all three on the first boss leaves your party exposed to the second. Coordinate potion usage around the boss's recovery turns — the turns where the queue shows no incoming damage — and you extend the effective life of every party member across the full dungeon run.
Preparing Your Party for Torment Mode
Before stepping into harder content, every hero in your party needs the right Race, Base Class, and Super Class evolution chosen with Torment Mode breakpoints in mind. For example, a Human Warrior promoted into the Knight Super Class unlocks the Shield Wall passive, which is the only defensive layer that caps incoming boss damage below the 340-per-hit threshold during the Phase 2 enrage of the Abyssal Sentinel. The wrong Race-Class pairing not only cuts your base stat scalings (some miss out on the +15% Critical Rate racial bonus that High Elf Mages provide) but also locks you out of the job-specific skill tree nodes like Execute or Arcane Surge, leaving your dungeon team unable to clear the HP-check walls in Torment Mode floors 4 and beyond.
Picking Race, Talent, and Base Class
Hero creation rolls a Race and a passive Talent, with rarer rolls producing stronger results. For boss progression, the strongest early-race picks reported by community data are Nightborn (attacks heal 15% of damage dealt) and any Race that pairs a high stat floor with a defensive passive. Talents matter as much as Race: the rarer the roll, the bigger the stat delta between your team and the boss.
Base Class choice shapes the Super Class you evolve into at the Trainer's Shrine in Act 2. The six base options are Warrior, Thief, Mage, Fist, Bard, and Archer. For pure boss damage, Fist and Mage are the strongest picks. For survivability across long Torment Mode runs, Bard's buff shell is widely reported by players as the safest support shell.
| Base Class | Best Super Class For Bosses | Why It Works |
|---|---|---|
| Warrior | Paladin / Berserker | Tanky frontline that soaks heavy turns |
| Thief | Assassin | Burst windows for short boss phases |
| Mage | Archmage | Highest sustained Skill damage |
| Fist | Bard-Buff / Rogue-Burst | Hybrid utility across phases |
| Bard | Support Bard | Buffs and shields scale with party size |
| Archer | Ranger Sniper | Single-target boss damage |
Building a Synergy Stack
A four-hero party can carry two damage dealers, one support, and one tank for most fights. In Torment Mode, the community-recommended ratio shifts to one damage dealer, two supports, and one tank because boss damage is high enough that pure DPS races get burst down before they can break the boss's enrage timer. A typical endgame comp reported on community testing pairs an Archmage with a Paladin frontline, then fills the backline with a Support Bard and a Fist hybrid.
If you are still early in your progression and have not unlocked Super Classes yet, the Pixel Lineage beginner walkthrough for safe progression covers the rebirth path that unlocks the Trainer's Shrine and the Super Class evolution step. That guide is the natural prerequisite to any Torment Mode attempt.
Unlocking Torment Mode and the Harder Difficulty Tiers
Pixel Lineage runs on three difficulty modes: Normal, Hard, and Torment. Each one raises the boss's damage, health, and action queue length. Unlocking the higher tiers requires specific in-game milestones that you will not see in the UI unless you complete the prior difficulty cleanly.
Unlock Requirements by Mode
| Difficulty | Unlock Condition | Boss Damage | Boss HP | Queue Length |
|---|---|---|---|---|
| Normal | Default | 1.0x | 1.0x | 2 actions |
| Hard | Clear every boss on Normal once | 1.4x | 1.3x | 2 actions |
| Torment | Clear every boss on Hard once | 1.9x | 1.6x | 3 actions |
| Secret Boss | Triggered by floor-event chain | 2.4x | 1.9x | 3 actions |
Community testing confirms the standard difficulty is "not meant to be easy," and that progression is intentionally gated by clean clears on the prior tier. There is no level shortcut — you must beat every boss on Hard to unlock Torment Mode.
How to Unlock Torment Mode in Practice
Think of Torment Mode as a gated third tier that the game only opens after the standard boss ladder is fully cleared, and treat each step as a real gate rather than a formality — Hard Mode is a hard checkpoint, not a shortcut, and the difficulty selector sits at the dungeon entrance altar alongside the Torment Mode option once the prerequisite chain resolves.
-
Beat every dungeon boss on Normal difficulty at least once, including the optional Secret Boss encounters that spawn on rare floor events
-
Switch the difficulty selector at the dungeon entrance to Hard, and clear every boss again — failures do not lock you out, but they do not progress the unlock either
-
Once the Hard ladder is complete, the Torment Mode option appears in the dungeon entrance menu the next time you log in
-
Save the Torment Mode attempts for runs where you have at least 5 to 10 hours of honing invested into your main weapon at the Blacksmith, because fights at this tier assume non-starter gear
Hard Mode Versus Torment Mode
Hard Mode is a tuning check. Boss damage jumps by 40% and health by 30%, but the action queue stays at two. You can still clear Hard Mode with a competent four-hero party that knows the Two-Turn Read. Torment Mode is the actual endgame. The action queue grows to three, so you have to plan one more turn ahead on every heavy hit, and the boss's damage multiplier is high enough that a missed Guard is usually a dead hero.
If you want a deeper breakdown of dungeon difficulty, the Pixel Lineage dungeon farming routes guide covers Hard Mode and Nightmare Mode rotations and the optimal farming paths for each. The two articles share the underlying floor system but split the focus between boss strategy (here) and steady-state farming (there).
The Best Dungeon Team Compositions for Boss Fights
A team's class mix matters more than individual power in Torment Mode. The most consistent four-hero compositions reported by players are the Tank-Support-Burst-Tempo comp and the Aura Stack comp, both of which absorb the boss's burst turns without losing a Life.
The Tank-Support-Burst-Tempo Comp
This composition is the safest entry into Torment Mode. One tank soaks the heavy turns, one support rotates buffs and shields, the burst dealer dumps Energy into the boss during safe windows, and the tempo hero runs the Guard-and-Meditate loop to keep the team energy-neutral.
| Role | Recommended Class | Key Action on Heavy Turn |
|---|---|---|
| Tank | Paladin or Berserker (Warrior tree) | Guard + taunt Skill |
| Support | Support Bard (Bard tree) | Party shield Skill + Meditate |
| Burst | Archmage (Mage tree) | Save Energy for safe window |
| Tempo | Fist hybrid (Fist tree) | Guard on telegraphed hit |
The Aura Stack Comp
The Aura Stack comp layers every buff and debuff in the game on a single hero, then turns that hero into a damage monster for two to three rounds. The community call this the Aura Burst Window, and it works because Bard buffs, Mage debuffs, and Fist passives all stack additively in the current patch. The risk is that the aura carrier dies in one hit if a heavy turn lands while they are unshielded, so Guard timing is critical.
| Aura Source | Class | Buff Type |
|---|---|---|
| Attack Up | Bard | +25% damage on aura carrier |
| Defense Down | Mage | Boss takes +20% damage |
| Speed Up | Fist | Aura carrier acts first next round |
| Crit Up | Thief | +30% crit chance on burst window |
Composition Matchups by Boss
Not every boss rewards the same comp. AoE boss phases punish the Aura Stack comp because the aura carrier dies alongside the team. Single-target boss phases with a long enrage timer reward the Aura Stack comp because the burst window wipes the boss before the enrage fires. The Tank-Support-Burst-Tempo comp is the more universal answer and is what most Torment Mode clear teams run on their first attempt.
For raid-scale content where you fight bosses with eight to ten heroes, the Pixel Lineage Crimson Abyss raid guide covers the larger party setups and the boss list for the deepest raid content in the current update.
Boss Drops, Rewards, and What to Spend Them On
Boss kills are the primary source of high-rarity gear, sigils, and dungeon currency in Pixel Lineage. The drop table is tiered by difficulty, so the same boss on Hard Mode drops materially better loot than the Normal Mode version, and Torment Mode clears are where the top-end gear actually comes from.
Standard Boss Drop Table
| Boss | Normal Mode Drops | Hard Mode Drops | Torment Mode Drops |
|---|---|---|---|
| Floor 3 Warden | Rare weapon, small EXP | Epic weapon, mid EXP, Knowledge shard | Legendary weapon, large EXP, Rare sigil |
| Floor 6 Sentinel | Epic weapon, mid EXP | Epic weapon + armor, mid EXP, sigil | Legendary set piece, Rare sigil, dungeon token |
| Floor 9 Phantom | Epic armor, sigil | Legendary armor, Rare sigil, Knowledge | Legendary set piece, Epic sigil, dungeon token |
| Floor 12 Overlord | Legendary weapon, Rare sigil | Legendary set, Epic sigil, dungeon token | Mythic-tier drop chance, Epic sigil, raid invite token |
| Secret Boss | Rare–Epic sigil, EXP | Epic sigil, dungeon token | Mythic sigil, large EXP, raid invite token |
The Dungeon Drop Economy
Pixel Lineage dungeon drops feed three sinks: gear honing at the Blacksmith, sigil upgrades for class evolution, and the Auction House for player-to-player trading. Most Torment Mode clears are run to farm dungeon tokens, which are the trade currency for the best consumables in the game. The token cap per week is tight, so picking the right boss to farm matters more than grinding the easiest one.
| Drop Type | Best Use | Priority |
|---|---|---|
| Gear | Hone at Blacksmith (+1 to +10) | Hone only gear you will keep for 2+ tiers |
| Sigil | Slot into Ultra Form unlocks | High — sigils gate Ultra evolution |
| Dungeon Token | Auction House consumables | Medium — only buy what you will use this week |
| EXP / Knowledge | Rebirth prep and talent leveling | High — required for higher-tier rolls |
| Raid Invite Token | Crimson Abyss raid access | High on weekends, medium on weekdays |
The Sigil Connection to Progression
Boss drops include sigils, and sigils are the gate to Ultra Form evolution. Community testing reported across Pixel Lineage progression threads estimates that roughly 30% of a player's weekly token income should go to sigil upgrades if they are pushing for an Ultra Form unlock, and 70% to gear honing. The split flips for players still working through Super Class unlocks — most of their drops should go to the Blacksmith until the core weapon is at +5 or higher.
Torment Mode Strategy: Reading the Boss and Surviving the Enrage
Most Torment Mode wipes happen in the final 20% of the boss's health bar, when the boss enters an enrage phase and starts cycling heavy hits faster than the team can recover. The counter is a clean enrage plan: identify the enrage trigger, save your big cooldowns for that window, and accept that one party member may be a sacrifice.
Identifying the Enrage Trigger
The boss's health bar shows a yellow flash at 50% and a red flash at 25%. The yellow flash is the Phase Shift, where the boss's action queue swaps to a more aggressive pattern but the damage stays the same. The red flash is the Enrage Trigger, where the queue length grows to four and the damage multiplier jumps another 20%. Plan your burst window to land before the red flash, and you skip the enrage entirely on most bosses.
| Boss HP Threshold | Trigger | Action Queue | Damage Multiplier |
|---|---|---|---|
| 100% to 51% | Normal phase | 3 actions | 1.9x |
| 50% to 26% | Phase Shift | 3 actions, harder pattern | 1.9x |
| 25% to 0% | Enrage | 4 actions | 2.3x |
The Enrage Burst Plan
The community-canonical enrage plan is to push the boss from 50% to 0% in one clean burst window so the enrage never fires. The plan requires your Archmage or aura carrier to hold their top Skills until the boss hits the yellow flash, then unload Energy in a two-round window. Support Bards shield the burst dealer, the Tank Guards on the next heavy turn, and the tempo Fist hero pops Guard and Meditate to keep Energy flowing.
If the burst window fails and the boss enrages, the secondary plan is the Fodder Sacrifice: have your lowest-investment hero Guard on the enrage turn to soak one fatal hit, then revive them after the fight at the Inn. Losing one Life is cheaper than losing the run.
Common Mistakes in Torment Mode
The most common wipes reported by players are missed Guard timing, overcommitted Energy before the burst window, and not enough potions saved for the enrage phase. The fix for all three is the same: play the first half of the fight conservatively, save big Skills and potions for the burst window at 50%, and accept that the enrage phase may require a sacrifice hero.
Putting It All Together: A Clean Torment Mode Run
A successful Torment Mode run is 70% preparation, 20% reading the boss, and 10% execution. The preparation phase covers gear honing, sigil grinding, and the right party comp. The reading phase is the Two-Turn Read on the action queue. The execution phase is the burst window at 50% and the enrage plan at 25%.
The Pre-Run Checklist
Before you start any Torment Mode run, run through this checklist so a single missed loadout detail doesn't wipe a 25-minute dungeon attempt and force you to restart from the boss's pre-50% phase: the six items below cover the four failure points the Torment Mode scaling system actively punishes — under-geared tanks, energy-starved burst dealers at the 50% health threshold, missing revival consumables banked at the Inn, and players who queue the wrong dungeon entrance selector (Hard Mode shares the same lobby UI as Torment Mode but drops Normal-tier loot with no Torment-exclusive affixes).
-
Confirm the team has at least one tank with Guard access and one support with party shield access
-
Confirm the burst dealer has at least 6 Energy saved by the boss's 50% health threshold
-
Confirm every hero carries three potions and the party has at least one revival consumable banked at the Inn
-
Confirm the Blacksmith gear is at +5 or higher on the main weapon of every hero, because Torment Mode fights assume non-starter gear
-
Confirm the difficulty selector is set to Torment Mode at the dungeon entrance, not Hard Mode by accident
A Sample Two-Boss Run
The clean-run shape for a 6-floor Pixel Lineage dungeon with two boss rooms treats each floor pair as a distinct resource phase, where Floors 1 to 3 bank Energy and Meditate charges for the first boss burst window, Floors 4 to 5 refill tempo through low-cost Fist swings to keep Energy above 4, and Floor 6 commits everything to a single 50% burst with an enrage trade at 25% — a structure that scales cleanly into Torment mode once the second enrage modifier is unlocked.
-
Floors 1 to 3: Run conservatively, save Skills for the first boss, use Meditate to keep Energy above 4
-
Boss 1 (Floor 3): Burn the burst window between phases, save the Bard's party shield for the enrage flash
-
Floors 4 to 5: Conserve potions, run a tempo Fist to keep Energy flowing
-
Boss 2 (Floor 6): Full burst window at 50%, accept one sacrifice hero at 25% if the enrage fires
-
Post-run: Bank all dungeon tokens, hone any gear you will keep, spend sigils on Ultra Form progression
For a deeper look at the floor system and how it interacts with raids, the Pixel Lineage dungeon enemies guide breaks down every biomes's enemy roster and the late-game content unlock path.
Frequently Asked Questions
What is the best team comp for Torment Mode bosses?
The Tank-Support-Burst-Tempo comp is the safest answer: a Paladin or Berserker tank, a Support Bard, an Archmage burst dealer, and a Fist tempo hero. The Aura Stack comp is faster on single-target boss phases but is fragile against AoE boss phases and requires near-perfect Guard timing. For a first Torment Mode attempt, the Tank-Support-Burst-Tempo comp is the most consistent option across the full boss list.
How do I unlock Torment Mode in Pixel Lineage?
You must clear every boss on Hard Mode at least once, including the optional Secret Boss encounters. Once the Hard ladder is complete, the Torment Mode option appears in the dungeon entrance menu the next time you log in. There is no level shortcut, and you cannot skip the Hard Mode ladder by paying Robux or grinding a single boss repeatedly.
What are the best boss drops to spend dungeon tokens on?
The best use of dungeon tokens is consumables you will burn this week, not gear you might use someday. Priority is raid invite tokens on weekends, sigil upgrade materials for players pushing Ultra Form unlocks, and Blacksmith honing stones for players still working through the +1 to +10 progression. Auction House flips are only worth it if you know the market price floor for the item you are buying.
Can I solo Torment Mode boss fights in Pixel Lineage?
Yes, but the window is narrow. A well-honed single hero with the right Super Class can clear most Torment Mode bosses solo, but the enrage phase at 25% health is much harder without a support to shield the burst. Solo runs also burn through potions faster because you have no off-tank to share the heavy hit. Multiplayer is the recommended path for first clears, and solo is the optimization for farming.
What happens if my whole party wipes on a Torment Mode boss?
You lose one Life per hero (out of three) and respawn at the Castle hub. The dungeon resets, the boss drops are lost, and your Blacksmith honing progress is preserved. You can re-enter the dungeon immediately and retry. The only long-term cost is the Life loss, which is restored by completing a full Normal Mode run or by spending a revival consumable at the Inn.