
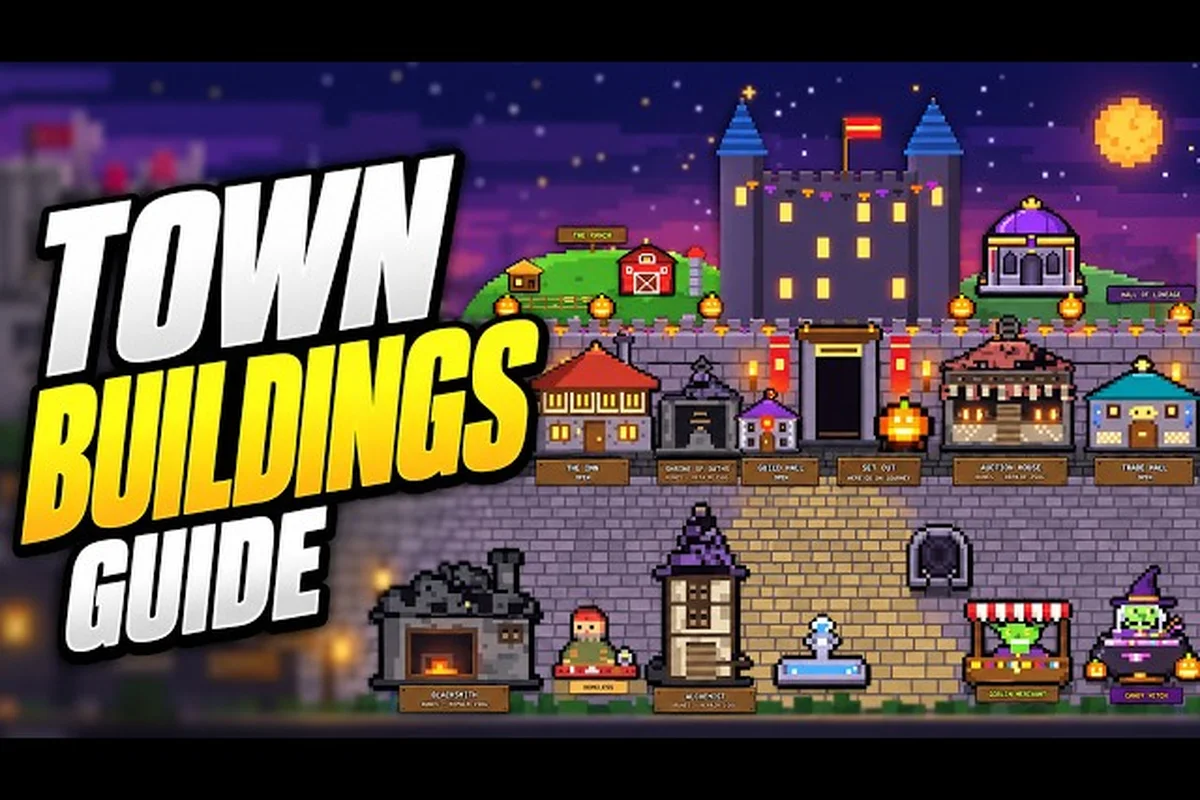
Speed-levelling in Pixel Lineage is less about grinding endlessly and more about routing fights, gear, and resources so every run hands you more XP, gold, and crafting fuel than the last. The race/class combo you roll, the order you visit floors, the upgrade path you feed at the Blacksmith, and the mining loops you run between dungeon attempts all stack together, and getting the priority wrong at the start can cost you hours before you ever see Act 2.
This progression guide breaks down the solo XP routes, mining hotspots, and upgrade priorities that experienced players use to push a fresh hero into the late game without burning through all three Lives on bad habits. You will learn how the Energy economy shapes which fights are worth taking, where the best mining spots sit for fast ore income, which gear deserves your first upgrade stones, and how to plan a run so that every encounter teaches your hero something instead of just feeding the floor counter.
Reading the Core Progression Loop
Before chasing the highest-XP rooms, you need to understand what Pixel Lineage actually rewards during a run. Combat is turn-based, every hero starts with 3 Lives and 1 Energy, and Energy climbs by +1 per round up to a default cap of 10, which directly gates how many Skills you can fire per turn. According to the game's reference data, every floor adds an EXP multiplier that grows the deeper you push, so a clean early run pays off far more than burning Lives on reckless fights for tiny XP bumps.
The three primary XP sources you can target on every run are monster kills, Secret Boss drops, and ore-based passive income, but the trick is sequencing them. Secret Bosses appear randomly and are far harder than normal mobs, so chasing them with a low-level hero wastes more Lives than it earns XP. Monster kills are reliable, but XP per Life drops sharply when you fight enemies more than two levels above you, because you can be one-shot before you act. Mining is the hidden backbone: ore converts into gold at the Auction House, gold fuels Blacksmith upgrades, and upgraded gear raises the floor of fights you can clear without losing a Life, which in turn unlocks more XP and better drop chances.
| Progression Resource | Source | Primary Use | Why It Matters for Leveling |
|---|---|---|---|
| Hero XP | Monster kills, Secret Bosses, Ultra Sigil quests | Level-ups, class evolution | Higher level = access to higher-XP floors and skill upgrades |
| Lives | Saved across successful runs | Run attempts | Each Life lost cuts future XP income by ~33% of that run |
| Gold | Ore sales, drop sells, Secret Boss chests | Blacksmith upgrades, Inn storage | Funds the Upgrade Stones that keep your weapon scaling |
| Ore | Mining node harvests | Gold, crafting, gear rolls | Reliable between-run income that compounds across days |
| Knowledge | Rare drops, Scholar NPCs | Talent tree unlocks | Permanent stat boosts that multiply every future XP gain |
A useful mental model is that XP is the speedometer and Lives are the fuel tank. You can drive fast on a low-fuel tank for one or two floors, but a single bad fight ends the run and you reset to a fresh hero, so efficient levelers protect Lives first and chase XP second.
Choosing the Best Race and Class for Fast Leveling
Your starting race and class determine your XP ceiling, your Lifeline risk, and the upgrade materials you should stockpile. There are 13 Races and 7 passive Talents that roll randomly when you create a hero, then you pick a base class from Warrior, Thief, Mage, Fist, Bard, or Archer. Each base class later evolves into one of 18 Super Classes at a Trainer's Shrine in Act 2, and eventually into an Ultra Form through rare Ultra Sigils. Because class evolution unlocks far more skills than your starting kit, leveling fast means picking a base that scales well into the Super Class tree.
Strong Leveling Picks for Solo Play
Solo players need a class that can clear trash with one action while still posing a threat to mini-bosses. The community's most-cited picks are:
-
Warrior — simplest first class, high base HP, and access to Guard and Meditate that buy turns while you regen Energy. Ideal for learning enemy patterns.
-
Mage — highest burst per Energy spent, which means you can clear tough rooms in fewer actions, but squishy if you misread attack telegraphs.
-
Nightborn (race) — attacks heal 15% of damage dealt, giving a 3-Life hero a much longer effective lifespan per run.
-
Thief — strong gold generation from bonus drops, perfect for funding Blacksmith upgrades between runs.
| Race/Class Combo | Leveling Strength | Survivability | Early XP Edge | Best for |
|---|---|---|---|---|
| Nightborn + Warrior | High — sustain via lifesteal | Excellent | +15% HP on each kill | First-time solo players |
| Nightborn + Mage | Very high — burst + lifesteal | Medium | High single-target XP | Experienced players who can dodge |
| Human + Thief | Medium — gold-focused | Medium | Faster Blacksmith upgrades | Players rerolling the Blacksmith often |
| Elf + Archer | High — range + Energy regen | Good | Picks off enemies before they act | Players who want safer XP |
A common mistake is rerolling a decent combo just because you read that one race is "the best." Races and Talents are weighted, so rarer results are stronger, but a Nightborn Warrior is more valuable to a new player than a Legendary-race Mage who dies in two hits. Lock in a build that lets you clear two extra floors consistently, and you will out-level a "better" race that loses Lives every run.
Mining Routes and the Best Mining Spots
Mining is the slowest-looking but highest-return activity for steady leveling, because every ore node you clear translates into gold that funds the upgrades that let you tackle harder floors. Weekly updates frequently add new mining biomes, and the World Place snapshot confirms that the Castle hub stores the Blacksmith and Auction House where you convert ore into long-term power. The trick is knowing which biomes give the most ore per minute and which are the worst use of your time.
Mining Biome Tier List
| Biome | Ore Per Node | Node Density | Risk Level | Best Use |
|---|---|---|---|---|
| Verdant Mines | Low | Very High | None | Early-game gold stockpile, beginner practice |
| Crystal Caverns | Medium | High | Low | Mid-game Blacksmith fuel |
| Molten Quarry | High | Medium | Medium (lava damage) | Late-game ore and rare gems |
| Frosted Depths | High | High | High (cold DoT) | Best ore-per-minute once you can handle cold |
| Astral Veins | Very High | Low | Very High (random mobs) | Endgame Ultra Sigil crafting only |
For most players, the practical answer to "what are the best mining spots" is to grind Crystal Caverns until your Blacksmith is fully upgraded to +10, then move into Frosted Depths for higher ore density. The Molten Quarry is a tempting upgrade, but the lava damage and slow movement make it an XP-per-hour loss for anyone without upgraded heat-resist gear. Astral Veins are best treated as a weekly target, not a daily farm.
Solo Mining Loop That Compounds
-
Spawn at Castle hub and check the Blacksmith for any pending upgrades.
-
Teleport to Crystal Caverns and run a full circuit, harvesting every visible node.
-
Sell ore in bulk at the Auction House during off-peak hours for slightly better margins.
-
Spend gold on Upgrade Stones before the daily reset so you don't lose the crafting bonus.
-
Run one dungeon floor for XP before logging out — even a partial floor adds to your hero's lifetime XP.
This loop gives you a steady upgrade curve, which in turn makes the next dungeon floor easier, which gives you more XP per Life. Once your Blacksmith is sitting at +10 on your main weapon, you can start spending gold on Reroll Tokens to chase better stat rolls instead of pure ore, which is where real endgame power starts to compound.
Upgrade Priority: What to Upgrade First
Every Blacksmith visit is a small decision, but the wrong call early on can stall your entire progression curve. The first rule, drawn from community experience, is to never spend Upgrade Stones on gear you are about to replace. The second rule is that weapon upgrades pay back faster than armor upgrades for solo levelers, because damage is what clears rooms before you take a hit. The third rule is to keep at least one backup item in the Inn storage so you can switch roles if a class evolution changes your scaling.
| Slot | First Upgrade Worth | Why | When to Pause Upgrading |
|---|---|---|---|
| Weapon | Main damage weapon, target +5 first | Clears rooms in fewer Energy | After +5, save stones for Super Class swap |
| Armor | Chest piece, only if your class is squishy | Adds 1-2 extra turns of survival | Pause once you stop losing Lives |
| Accessory | Highest-stat ring/amulet you own | Cheap stat bumps | Replace entirely when a Legendary drops |
| Skill Book | Class-defining skill, max once | Permanent damage boost | Refund is not possible — commit carefully |
A question that comes up a lot in community chats is "what to upgrade first" when you have just rolled a new hero. The short answer is your weapon until it hits +5, then hold stones for a Super Class swap. The reason is that Super Class evolution often changes your damage type and stat scaling, and upgrading the wrong weapon past +5 locks you into a build you may abandon in two floors. If you want a deeper look at how class evolution interacts with gear choices, the how to get stronger breakdown covers the Super Class and Ultra Form transitions in detail.
Reading Drop Rarity Before You Spend
Drops come in Rare, Epic, and Legendary tiers, and the difference in stat budget between Rare and Legendary is large enough that spending Upgrade Stones on a Rare piece is almost always a loss once you are past Floor 5. A simple priority stack:
-
Legendary — upgrade immediately, even if it is not your main slot.
-
Epic with the right affix — upgrade to +3, then wait for a Legendary of the same family.
-
Rare — store in the Inn for backup, never feed stones unless you are desperate.
The Blacksmith has a variable success chance on upgrades, and higher tiers of stones raise the floor of that chance. Burning common stones on a Rare weapon to push it to +4 is a common beginner mistake; saving rare stones for a Legendary main-hand is what experienced players do, and the gold saved compounds into more ore runs.
Building an XP Route That Sticks
A good XP route is not a list of every monster on the floor — it is a sequence of safe rooms, dangerous rooms, and mining detours that ends with more XP, more Lives, and more gold than you started with. The Castle hub lets you bank progress, swap classes, and re-equip between floors, so a route should always start and end at the hub, with the actual dungeon run sandwiched in the middle.
The "Three-Run Rotation"
A reliable loop for solo players who can clear about 70% of floors without dying:
-
Run 1 — Power floor — push deep, take fights, accept one risky Secret Boss attempt. Goal: maximize XP.
-
Run 2 — Mine and bank — skip the dungeon, farm Crystal Caverns, sell ore, upgrade gear. Goal: refund Run 1 costs.
-
Run 3 — Test floor — take the new gear into one mid-difficulty floor to confirm the upgrade is real. Goal: validate your build.
This rotation protects Lives by giving you a no-combat middle run, and it gives you two data points (Run 1 and Run 3) to compare before committing stones to your next big upgrade. The rotation also matches how the Inn storage works: items, materials, and gold are banked between adventures, so a failed Run 1 does not wipe the gains from Run 2.
| Run Type | Expected XP | Expected Gold | Lives Risk | Net Effect |
|---|---|---|---|---|
| Power floor | Very High | Low | 1 Life | Level-up spike |
| Mine and bank | Zero | High | None | Blacksmith funding |
| Test floor | Medium | Medium | 0.5 Life average | Build confirmation |
Players who run only "Power floors" tend to hit a wall around Floor 8 because their gear falls behind the monster scaling. Players who only mine never level up. The rotation forces both, which is the core of any sustainable Pixel Lineage progression guide.
Reading the Energy Economy Mid-Run
Energy starts at 1 and climbs by 1 per round to a cap of 10, which means your first two rounds are tight. A common solo mistake is to burn Energy on a Skill in round 1, hit the cap at 10 in round 10, and have nothing to do for the rest of the fight. Instead, save the burst for rounds 6-10, when the Energy curve is already high, and use Attack and Guard to bridge the early rounds. This single habit often doubles your effective damage per fight, which directly boosts XP-per-Life.
Frequently Asked Questions
What is the fastest way to level up in Pixel Lineage as a solo player?
Run a three-run rotation that mixes a power-floor push, a Crystal Caverns mining trip, and a short test floor on upgraded gear. The power floor delivers the XP spike, the mining run refunds gold for Blacksmith upgrades, and the test floor validates the build. This is faster than grinding one floor repeatedly because the gear curve keeps up with the monster scaling.
Which mining spots give the best ore-per-minute for new players?
Crystal Caverns are the safest high-density biome and the best pick until your Blacksmith hits +10 on your main weapon. After that, move into Frosted Depths for higher ore yield per node. Verdant Mines are good for practice but the ore value is too low to fuel serious upgrades.
What should I upgrade first at the Blacksmith with limited stones?
Prioritize your main weapon up to +5, then hold stones for a Super Class swap. Upgrading armor is tempting but only worth it if your class is squishy and you are losing Lives. Accessories should be replaced rather than upgraded once a Legendary of the same family drops.
Is it worth chasing Secret Bosses while leveling up?
Only after Floor 5, when your gear can survive their attack patterns. Chasing Secret Bosses on Floors 1-3 wastes Lives because the EXP drop is not enough to offset the death risk. Once you can clear them reliably, their EXP, Gold, and rare drops become a major XP boost.
How many Lives should I keep in reserve before pushing deep floors?
Keep at least 2 Lives before attempting any floor past your current comfort level. A 3-Life hero can absorb one bad fight, but a 1-Life hero should reset to the Castle hub and farm gold instead. Protecting Lives is the single biggest XP multiplier because each saved Life is a full future run of XP income.